Monday, September 29, 2014

Fresh Produce Seasonality Guide

Eat seasonally and buy locally grown whenever you can! 

Here's a convenient cheat sheet to help you do that. It's a seasonality guide to fresh produce, listing the basic stuff that you can find in most grocery stores, as well as some uncommon specialty items, by the time of year they are typically available "in season". That's when they're the freshest, most flavorful AND the cheapest. It's nice how it works out that way. 


Spring
Summer
Fall
Winter
Year Round
Apricots
Artichokes
Asparagus
Broccoli
Chives
Collard Greens
English Peas
Fava Beans
Fennel
Fiddlehead
Green Beans
Honeydew
Mango
Morel Mushrooms
Mustard Greens
Oranges
Limes
Pea Pods
Pineapple
Ramps
Rhubarb
Snow Peas
Sorrel
Spinach
Spring Baby Lettuce
Strawberries
Sweet Corn
Sugar Snap Peas
Swiss Chard
Vidalia Onions
Watercress 
Apricots
Beets
Bell Peppers
Blackberries
Blueberries
Boysenberries
Cantaloupe
Casaba Melon
Cherries
Crenshaw Melon
Cucumbers
Eggplant
Figs
Garlic
Grapefruit
Grapes
Green Beans
Green Peas
Honeydew Melons
Kiwifruit
Lima Beans
Limes
Loganberries
Nectarines
Okra
Peaches
Persian Melons
Plums
Radishes
Raspberries
Strawberries
Sweet Corn
Summer Squash
Tomatillo
Tomatoes
Watermelon
Zucchini
Acorn Squash
Apples
Belgian Endive
Bok Choy
Broccoli
Brussels Sprouts
Butternut Squash
Cauliflower
Celery Root
Chayote Squash
Cherimoya
Coconuts
Cranberries
Diakon Radish
Garlic
Ginger
Grapes
Guava
Huckleberries
Kohlrabi
Kumquats
Mushrooms
Parsnips
Pear
Persimmons
Pineapple
Pomegranate
Pumpkin
Quince
Rutabagas
Sweet Potatoes
Swish Chard
Turnips
Winter Squash
Yams
Apples
Belgian Endive
Bok Choy
Brussels Sprouts
Cherimoya
Chestnuts
Coconuts
Dates
Grapefruit
Kale
Leeks
Mushrooms
Oranges
Parsnips
Pear
Persimmons
Pummelo
Radicchio
Red Currents
Rutabagas
Sweet Potatoes
Tangerines
Turnips
Winter Squash
Yams
Avocados
Bananas
Cabbage
Carrots
Celery
Lemons
Lettuce
Onions
Papayas
Bell Peppers
Potatoes

Double Cherry Stuffed Pork Chops

What do you do with nice 1"+ thick bone in pork chops?  
Well, you could pan sear them in a cast iron skillet and finish them off in the oven. Or you could find something interesting to stuff them with, then pan sear them and finish off in the oven. That's what we did. Even though cherry season is over, cherries just sounded good and you can get frozen cherries all year that are perfect to use for this. The key ingredients are chopped cherries, diced granny Smith apple and caramelized onion held together with coarse breadcrumbs and seasoned with rosemary and orange zest. And, we made a cherry sauce to go with the chops. You will like this!
Ingredients for the stuffing - enough to stuff 2 chops
2  1" thick bone in loin pork chops
  1/2  cup pitted Cherries chopped
  1/2 cup coarse fresh bread crumbs
  1/2 Granny Smith apple diced
  1/2 medium sweet onion, diced
  1 tablespoon shredded Parmigian
  1/4 cup Parsley, finely chopped
  1 teaspoon Rosemary, finely chopped
  Zest of 1 Orange 
  2 teaspoon olive oil - divided
  Salt and Freshly Ground Black Pepper  
   
Directions - 
  • Preheat oven to 375
  • Put all the ingredients except for the onion and salt and pepper in a bowl.
  • In a cast iron skillet or heavy metal handled frying pan on medium heat, saute 1/2 of the onion in olive oil until soft and starting to brown, about 15 minutes. Then remove and mix into the rest of the stuffing mixture. Taste to see how much salt and peppers to add. Cooking the onion first sweetens them and adds more depth of flavor to the stuffing.
  • Cut a pocket in each pork chop and stuff with the stuffing mixture. Close with a couple toothpicks.
  • In the same skillet and without cleaning it, add a tablespoon of olive oil and the stuffed chops. On medium high heat, brown the chops on both sides, then add the the rest of the diced onion. 
  • Cover the skillet and put in the oven. Cook for 45 minutes. Check after 30 minutes to if the onions are sticking to the bottom of the skillet, if they are, add a little water.

Remove the chops to a plate and tent with foil to keep warm.

For the cherry sauce - 

3/4 cup pitted cherries, chopped
1/2 cup Chicken Stock
1/4 cup Cider Vinegar
1 tablespoon Fresh Chives,chopped
1 tablespoons Cilantro, chopped
1 tablespoons Butter
1 teaspoon honey


Pour the Chicken Stock, Cider Vinegar and the Cherries into the skillet you cooked the chops in. Cook, stirring, until stock has reduced and the Cherries have broken down a bit, about 10 minutes. Finish with Butter, Chives and Cilantro.

Spoon the sauce over the pork chops.

We had this with roasted potatoes, butter beans and an arugula salad (yah, a lot of starch...) probably would be better with Brussels sprouts or Swiss chard or mustard greens instead of the butter beans.

Wednesday, September 24, 2014

Pan Cooked Shrimp Dumplings

OK, sometimes we like a little Asian. Lisa thought shrimp dumplings would be the perfect thing to start with, she made these and she was right. They make great appetizers but we had them as the main event with chewy brown rice and sauteed bok choy as sides. Good combination, very tasty. 

These things have a lot of flavor on their own but you could put out hot Chinese mustard, duck sauce or Oriental chili sauce for dipping. We made a simple dipping sauce of Chinese mustard mixed with apricot jam. It worked.
Here's how they're made. You can increase the ingredient amounts easily to make a big batch and freeze them.  

Ingredients for 24 dumplings:

1/2 pound raw 16/20 shrimp, peeled and deveined
1 cup chopped Savoy or Napa cabbage
1 bunch scallions, chopped
3 cloves garlic, chopped
1 tablespoons finely chopped fresh ginger
2 teaspoons sesame oil
1 tablespoon tamari or soy sauce
1/4 teaspoon ground pepper
24 wonton wrappers
Cornstarch for sprinkling
1-2 tablespoons canola oil, divided
1-2 tablespoons butter divided


Cut 12 of the shrimp in half lengthwise. Add the rest of the shrimp to the cabbage, scallions, garlic, ginger, sesame oil, soy sauce and pepper and pulse in a food processor until finely chopped.
Set out wonton wrappers, a small bowl of water and a large baking sheet lined with parchment paper and sprinkled with cornstarch. Place 4 wrappers at a time on a clean work surface and spoon about 1 tablespoon of filling and a shrimp half onto the center of each. Wet your finger and run it around the edge of a wrapper, fold two opposite corners toward the middle of the filling just until they overlap, then fold the other two corners over the top to form a square. Press to seal in the middle. 
Make triangular shaped dumplings by folding two opposite corners together and pinching the edges closed.
Place on the prepared baking sheet, not letting them touch. If all the dumplings won’t fit in one layer, place parchment paper between layers.

Heat 1 tablespoon canola oil and 1 tablespoon butter in a large nonstick skillet over medium heat. Add enough dumplings to make a single layer, seam-side down and not touching. Cook uncovered until browned on the bottom, about 5 minutes. Turn them over and cook until brown on the other side, about 3 minutes more. Repeat with the remaining dumplings adding more oil and butter as necessary.


To freeze: Freeze uncooked dumplings, uncovered, on the parchment-lined baking sheet until solid, at least 8 hours. Once frozen, transfer the dumplings to an airtight container or freezer bag and return to the freezer.

Sunday, September 21, 2014

Zucchini Soup

My daughter Brittany loves zucchini soup and sent me the recipe she uses. I couldn't just leave it alone because I saw a few things that could make it even better. I decided to caramelize the zucchini and onion and add scallions and basil, plus Lisa made homemade chicken stock from left over rotisserie chicken. The sliced Calabrese pepper was added just because. 
Ingredients:

About 1/2 cup, extra-virgin olive oil, plus more for drizzling
4 medium zucchini, trimmed and cut into 1-inch pieces/half moon shapes 
1 medium sweet onion finely chopped 
½ cup thinly sliced scallions
½ cup finely chopped flat-leaf parsley
3 garlic cloves, finely chopped
About 1 teaspoon kosher salt to taste
About ¾ teaspoon freshly cracked black pepper to taste
2 cups chicken broth or homemade chicken stock 
2 tablespoons chopped basil, plus torn leaves for garnish
Sour cream
Shredded Parmigiano Reggiano 

Directions:

In a Dutch oven, heat 1/4 cup of the olive oil over high heat. Work in batches to avoid overcrowding the pot, cook the zucchini just on one cut side until golden and caramelized. As soon as the zucchini has browned on one side, transfer to a bowl or large plate.
Add the remaining olive oil to the pot. Add the onion, scallions, parsley and garlic and season with 1/4 teaspoon each of the salt and pepper. Cover and cook over medium heat until the onion becomes soft and translucent, about 10 minutes.
Return the zucchini to the pot and season with the remaining salt and pepper. Stir in the chicken stock. Use enough stock to just barely cover the vegetables. Bring to a simmer, then reduce the heat to low. Cover the pot and simmer until the zucchini is soft but not falling apart, about 20 minutes. Stir in the basil.
 
If you have an immersion blender, use it to puree the soup. If you don't, then transfer the soup to a food processor and pulse to a coarse puree, then stir back into the pot. Adjust the seasoning if necessary.
Ladle into bowls, top with a little Parmigian, a dollop of sour cream and a few basil leaves. Add some thin slices of hot pepper if you like. You'll need a nice thick piece of good crusty bread with this too.

Sunday, September 14, 2014

How to Brine Meat -- Wet and Dry Brining

Just want to share this article from the Food52 blog on brining meat.

How to Brine Meat -- And Why You Should Bother 
by Catherine Lamb • May 27, 2014


Have you ever suffered the travesty that is a dry, tasteless chicken breast? Or tried to cut into a pork chop, only to be rewarded with a bicep workout and a rumbling stomach? Or chewed your way through a turkey that tastes like it might've been made out of sand? 
We have, too. It was unpleasant. Thankfully, it never has to happen again -- just harness the power of science, and you can brine your way to consistently better meat. Here's why it works -- and how to use its potential for good.
Why Brine?
Brining was originally used for food preservation in the pre-refrigeration era. However, there are two solid reasons why you should brine your meat in this century: flavor and texture. Brining infuses the meat with savory, finger-lickin' flavors, all while tenderizing it to butter-soft texture. So how does it work?
Let us turn back the clock to seventh grade science class for a moment. Does the word "osmosis" ring a bell? That's how brining works: When you place meat in a bath of salty, flavorful liquid, the solution will travel into the meat in order to equalize the salt levels. This means that, before even hitting the heat, your meat has a higher liquid content -- so when you cook it, your meat will lose the same amount of moisture, but will still end up juicier. As culinary expert and general food science nerd Harold McGee puts it: "This is one time when we find our old nemesis 'water retention' actually playing a beneficial role!" 
While you brine, your meat is not only gaining liquid; it's also gaining salt, and the higher salt concentration will begin to break down its proteins. Think of the proteins in meat as tight, stubborn coils -- then salt comes along, gives them a deep tissue massage, and they begin to relax. This yields a meat with a more tender mouthfeel and reduced chewiness. Kenji Alt-Lopez of Serious Eats sums it up perfectly: less tightening = less moisture loss = juicier meat. 
What to Brine
Some meats benefit from brining more than others. Drier, leaner meats are at the top of the list, as they don't have as much fat to contribute moisture and flavor. Poultry breasts, pork chops, shrimp, and that infamous Thanksgiving turkey are all good candidates for brining. As barbecue season draws near, racks of ribs are also begging for a briny dip, which will help them retain moisture through a long smoke. Before purchasing a piece of meat to brine, check the label to make sure it hasn't already been injected with a salty solution.
Bath Time:
The basic ratio for any wet brine is 1 cup of salt to 1 gallon of water. If you're feeling fancy, throw in some smashed garlic cloves, peppercorns, or citrus -- also smashed. Another general rule of thumb is to leave your meat in its brine for roughly one hour per pound -- never brine your meat more than the prescribed amount, lest the proteins break down too far, turning it into unappetizing mush.
Pro tip: If your meat has skin on it, pat it dry a few hours before cooking time, then leave it in the fridge, uncovered. It will end up juicy and tender, with shatteringly crisp skin.


That's the Rub:
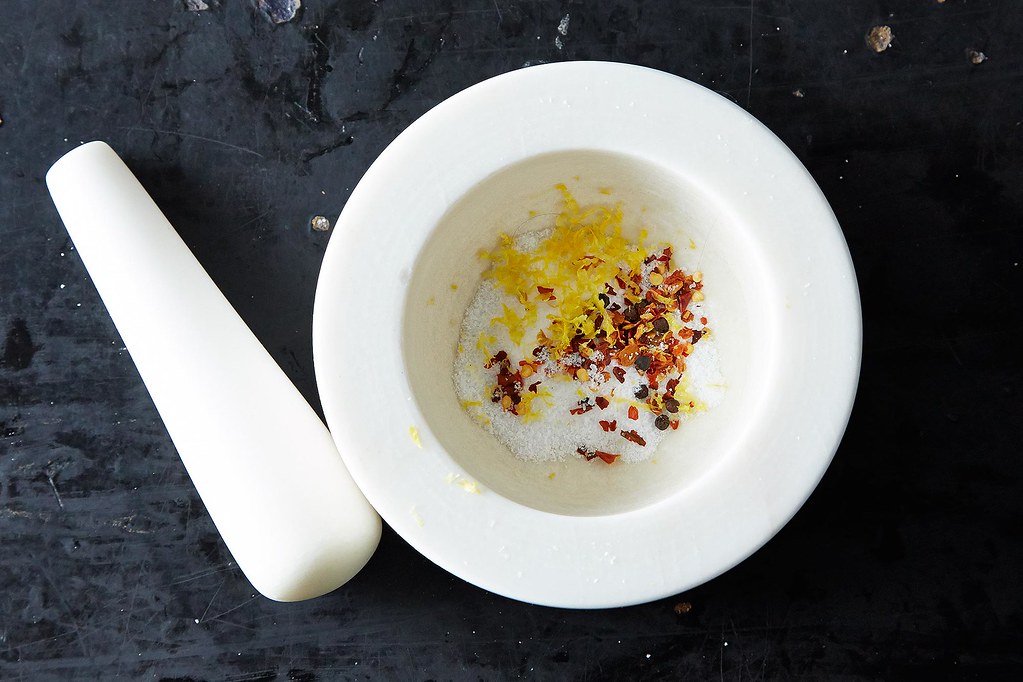
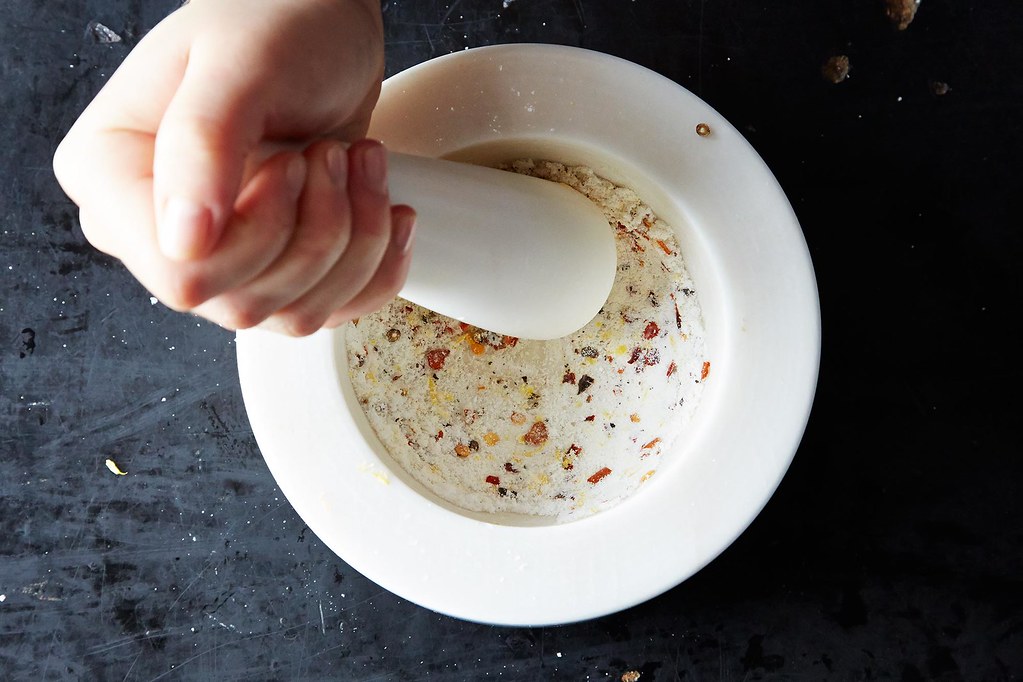
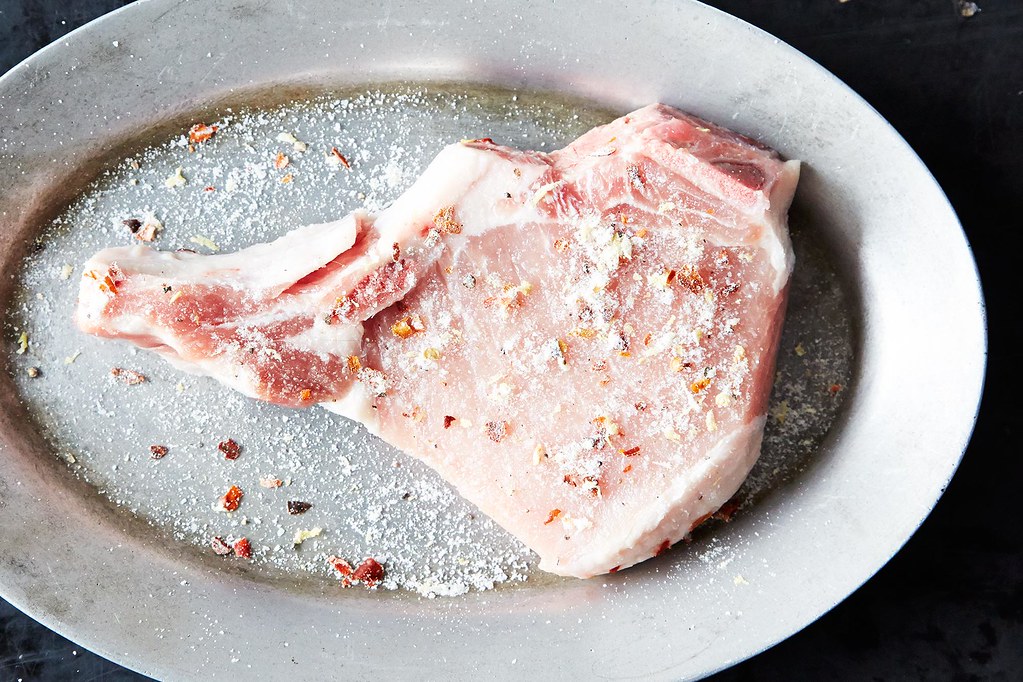
General dry brining technique calls for 1/2 teaspoon of kosher salt per pound of meat, plus whatever other (dried) herbs and spices you so choose. Pummel everything into a sandy texture with a mortar and pestle, then rub it onto your meaty canvas.
Place the meat in a Ziplock bag and refrigerate 1 to 2 days (though if you're in a rush, just leave it in for as long as possible). Pro tip: Adding a pinch or two of sugar to your dry brine will help the meat caramelize as it cooks. 
A few general brining safety tips:
  • To avoid scary bacteria, always brine in the fridge. 
  • For the same reason, make sure none of your meat is exposed to the air.
  • Always let your meat come to room temperature before cooking.
Dry Brining:
Dry brining is technically a misnomer. The term "brining" implies a liquid, and dry brining could more accurately be categorized as a rub, or a "cure," for your meat. However, the end result is quite similar. By coating your meat in a salty mixture, it both re-distributes moisture and pulls the seasoning deep into the meat. Dry brining is also a clean, simple seasoning option if you don't want to fill your fridge with large containers of submerged meats, for some reason.
How to Brine Meat on Food52  How to Brine Meat on Food52
That's the Rub:
General dry brining technique calls for 1/2 teaspoon of kosher salt per pound of meat, plus whatever other (dried) herbs and spices you so choose. Pummel everything into a sandy texture with a mortar and pestle, then rub it onto your meaty canvas.
Place the meat in a Ziplock bag and refrigerate 1 to 2 days (though if you're in a rush, just leave it in for as long as possible). Pro tip: Adding a pinch or two of sugar to your dry brine will help the meat caramelize as it cooks. 
How to Brine Meat on Food52
A few general brining safety tips:
  • To avoid scary bacteria, always brine in the fridge. 
  • For the same reason, make sure none of your meat is exposed to the air.
  • Always let your meat come to room temperature before cooking.
Here is the link to the complete article:
https://food52.com/blog/10405-how-to-brine-meat-and-why-you-should-bother

How to Make Wine Vinegar

I bought an inexpensive, but what I hoped might be, an enjoyable bottle of Zinfandel for us to have with dinner recently. The wine was disappointing. We were going to go ahead and finish it, but since we really didn't like it, we decided to experiment with it and try to make a little bit of red wine vinegar with what was left. Why not? Yes, you can get wine vinegar at every grocery store and it's cheap, but like you, we like doing things ourselves. 


In it's simplest form wine vinegar is just wine gone "bad". Let it sit open for a couple weeks and eventually the alcohol will evaporate and the wine will oxidize into vinegar. But there are more structured ways. I’ve read in different resources, that you do not
 need 'mother of vinegar' to make your own batch. Mother of vinegar is a 'slimish' looking substance composed of a form of cellulose and acetic acid bacteria that develops on fermenting alcoholic liquids, and acts as a starter to turn alcohol into acetic acid - vinegar - with the help of oxygen from the air. While not appetizing in appearance, mother of vinegar is completely harmless. You can use unpasteurized vinegar to use as a starter. I used Bragg’s organic unfiltered vinegar, because we always have some and it contains a mother naturally. 

There was about a cup of the zinfandel left but this can be scaled for any amount of leftover (or even just-opened) wine.

Ingredients:
1  cup wine
3  tablespoons starter vinegar, use a living variety. Bragg’s is readily available

Directions:
Pour your leftover (not from other people’s glasses) wine into a container with a large surface area, like as a bowl.
Add starter vinegar
Stir it all up

Cover with a towel and let it sit, stirring when you think of it, for a month. 


With small amounts like this, start tasting it at 3 weeks. It can take longer than a month, though.

Once it tastes like vinegar and not like wine, move it to an airtight container, with very little surface area exposed.  Swingtop and sealable wine bottles of the appropriate size work great.  
Although air is critical to the process of vinegar fermentation, continued exposure to air once you have your vinegar is a good way to ruin it/make it not be vinegar any more.

Sunday, September 7, 2014

Spider Wasps

As Yogi Berra said, "You can observe a lot just by watching." 

This morning I was poking around the garden and out of the corner of my eye I saw what I thought was a big spider creeping around. But on closer observation, it was a wasp dragging a spider across the mulch. Below is a still shot and a video. I watched this wasp drag the spider for about 20 feet. Then our cat Zinny curious about what I was looking at, intervened and the wasp flew off. 
This was a spider wasp. Spider wasps hunt spiders by stinging and paralyzing the spider then dragging or carrying it to a hole they use for a nest. An egg is then laid on the spider and the developing wasp larva consumes the paralyzed spider over the next month an a half. The wasp usually continues its development in a dormant stage over the winter in the nest, emerging the next spring. Spider wasps are types of hunting wasps that do not make colonies, but individually dispatch their specific prey and use it as food for their young in a solitary nest. Most spider wasps are blue-black and/or orange-red. 


Friday, September 5, 2014

2014 Vintage Norton - Da Vite a Vino

Listen, if you enjoy wine, few things feel as fulfilling and authentic as the experience of making your own wine from fresh grapes you’ve grown yourself. You don’t have to have a big vineyard. If well tended, just four or five wine grape vines in your back yard should give you a gallon or so of wine.  I know that's not much wine but it's fun and rewarding - it's like watching the completion of the circle of life! 

We harvested this years Norton grapes on Saturday August 2. After crushing and primary fermentation it looks like we will get just about a gallon that will give us 5 x 750 ml bottles. This year I made a 'second wine' by reinvigorating the fermentation with the spent grapes and skins from the first wine by adding sugar, water and more yeast. The sugar doesn't make it sweeter, it just gives the yeast more food to turn into alcohol. The color and taste will be lighter because most of those qualities went into the the first wine. We will get 5 bottles of that wine.

I've made wine many times before from wine grape concentrates for particular varieties. The wine I made for my daughters wedding was Valpolicella for the red and Verdicchio for the white - 30 bottles each. For my sons wedding I made Sangiovese for the red and Pinot Grigio for the white also 30 bottles of each.  


The gallon on the right is from the first crush. The gallon on the left is the second wine The color and taste will be lighter because most of those qualities went into the the first wine. The wine will settle out and clear. In a month or so I'll siphon it off the sediment on the bottom.